Wednesday, May 22, 2013
Books we love: The Mysterious Benedict Society
The Mysterious Benedict Society by Trenton Lee Stewart is the story of a group of extraordinary children who work together to stop a group of bad guys, and in the process, become a family. While the book doesn’t directly involve art or craft, I’m including it here because it includes an incredible amount of ingenuity.
The children spend most of their time figuring things out: solving puzzles, deciphering clues, and determining unusual solutions to unusual problems. To me, that is the very nature of any creative endeavor. Art and craft are rarely about following the instructions to get a cookie-cutter finished product: they always become personal in some way. We use a different material, our color choices are purely our own, or we flat-out make something that doesn’t even resemble whatever inspired it
My kids and I thoroughly enjoyed Reymie, Constance, Sticky, and Kate’s adventures. Anyone who enjoys a clever conundrum is sure to enjoy this book. And bonus, it’s a whole series!
Oh, and it has A House. I love Houses.
And I really, really want Kate’s bucket.
How to Make a Duct Tape Flower: A Tutorial by Scarlet Frishman
Today,
Scarlet is going to share with us the ins and outs of making duct tape
flowers! Scarlet has duct tape art down to a science: she makes flowers,
wallets, headbands, rings, and anything else that strikes her fancy. By
the way, this is Scarlet:
Scarlet took all the pictures and videos with her Sony Bloggie Touch Camera.
The pictures and video aren't bad, but we're still looking for a good
(and preferably free) photo and video editor for it, so please excuse
the graininess.Here is her instruction video. See below for photos and written instructions.
From Scarlet: Hi Guys! Here are my instructions for making duct tape flowers!
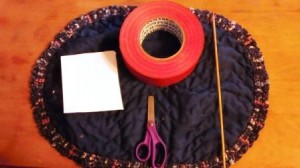
Materials:
A roll of duct tape in your chosen color.
A pair of scissors.
A pencil, pen, straw or any kind of stick
A piece of paper if you want to be able to remove the flower from the stick
Instructions:
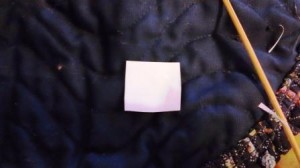
Cut a 1 in. square of paper.
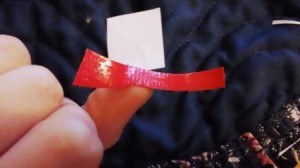
Cut a narrow strip of duct tape.
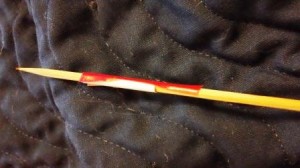
Wrap the piece of paper around the stick and use the small piece of duct tape to secure it.
*Make sure that you leave some duct tape sticking down off of the paper so that you can remove the flower from the stick later (skip this step if you are securing it to the stick permanently).
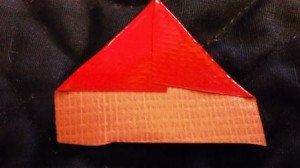
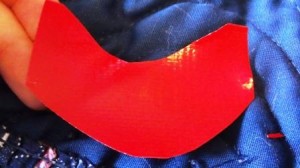
Next, cut a medium-sized rectangle of duct tape and fold down the top two corners.
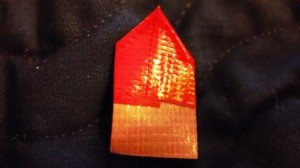
Clip off the sides, just leaving the point with an adhesive rectangle below it. This will be your flower petal.
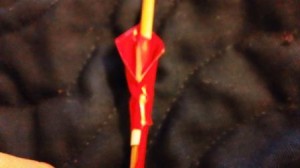
Wrap the petal around the stick, as so.
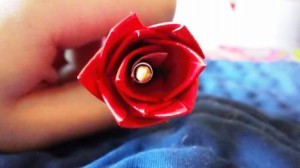
Repeat until your flower is about this big. This will take about 10 or so petals.
Once you’re happy with the size of the inside of your flower, fold down the corners so they look like this, but don't cut off the sides. Add about 15 petals this way.
If you made your flower so that it won't come off the stick, you are done! If you made yours so that it can come off the stick, then remove the little piece of duct tape that we put on at the beginning and slide the flower off the stick.
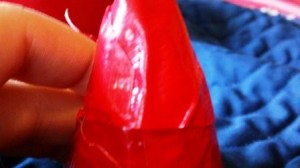
Next, cut a medium-sized cone shape out of duct tape.
And secure it to the base of the flower.
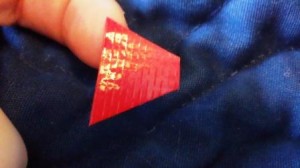
Cut a little triangle out of duct tape
and push it down into the center of the flower.
Now you're done! I hope you had fun making your own flower!
My Family's Oscar Bingo Party Plan
We love the Oscars! Beautiful dresses, funny skits and speeches, the red carpet – and bingo!
Our Oscar party has developed slowly over the years. Last year was the first time all of the kids were interested in watching. I was so excited!
These are our party essentials:
-Bingo cards: How About Orange’s bingo cards are the reason my ten year old son can’t wait for the Oscars! In addition to squares with things like “so and so wins best actor,” her cards have REALLY fun things like “Winner admits forgetting people,” “presenter flubs line,” and “someone tells his/her kids to go to bed!”. We have an amazing time with these cards, and I’m so glad Jessica put them out again this year.
-We’ll use highlighters to mark our bingo cards and we’ll dig out as many clipboards as we can find.
-Small gifts: If you’re like me, there are always a few odds and ends left over after Christmas. If you’re a more organized shopper, or if you need to fill in, the dollar store is your friend. My plan is to surreptitiously label the packages with who I want to get them and hand them out accordingly :)
-Snacks, aka junk food: Since we’ll all be staying up hours past our bedtimes, we’ll need some sustenance to get us through: fresh-popped popcorn and hot fudge sundaes with this fabulous (and easy) hot fudge sauce!
Since some of my kids are still young, they won’t have seen most of the nominated movies, so we don’t bother with ballots. If you have an older group, you can print ballots from How About Orange or Studio DIY.
As a matter of fact, if you do have an older group, check out Studio DIY’s Oscar party plan. She has some fantastic ideas for turning it into a gold- and glitter-filled night!
I love the glamor and fun of the Oscars, and turning it into a game night has made it even better. Now if only they’d move it to Friday night, so we could sleep in a little the next day!
P.S. Next year, I’m hoping that the kids will have seen enough old movies to play Turner Classic Movies Scene It? Deluxe Game with me as sort of a pre-Oscar warm-up.
Is Oscar night an event at your house?
Fun with Sharpies
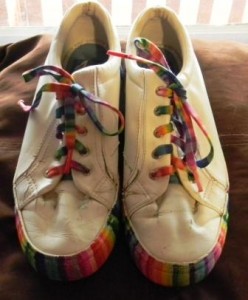
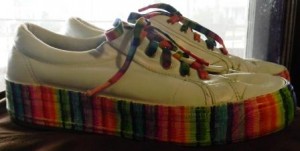
What can you do with an old pair of shoes, a new pack of Sharpies, and infinite patience? Well, if you're the very creative Scarlet, you do this!
Not only does the color pattern repeat exactly around the base of the shoes, the laces end in the same colors on each shoe.
These took her several hours of television time to complete. At one point, she couldn't find one of her markers - panic ensued! Luckily, it was recovered and all was well.
Here's a side shot:
Sometimes she just amazes me.
P.S. Scarlet used the Caribbean Sharpie 24-pack, which I can't find a link for. This pack has similar colors: Sharpie Fine-Tip Permanent Marker, 24-Pack Assorted Colors
Busy Weekend!
So, I’ve been a very busy bee this weekend. Yesterday was my husband’s birthday party. One of the things he asked for (about a week ago, so no pressure) was a watch box to hold his rather extensive collection of watches. He’d like one that held twelve, he said, but he could make do with one that held nine.
Nice watch boxes are really expensive.
And I like to make things.
So…
I ran around all week looking for a box that would work, or a watch box at an inexpensive store, and found nothing. Just as I was about to give up and buy him something boring, like underwear, I stopped in at Goodwill on Friday afternoon and low and behold, they had a beat-up old silverware box for a dollar!
The wood was solid and the hinges were in pretty good shape, so I didn’t let the Grandma’s attic smell or the faded pink lining deter me. I went straight to the craft store and loaded up on supplies: ¾ yard of black velvet, a 15x20 inch piece of artists’ mat board, E-6000 glue, and acrylic paints in gray and black.
Then came the fun part.
I have no dedicated “make stuff” space, so I usually just shut myself in the dining room and threaten bodily harm if anyone comes in. This time, though, I wanted it to be a true surprise. Alan (my husband) works an office job with office hours, so he’s usually home evenings and weekends. Luckily for me, he plays poker every other Friday night, and this was his “on” night. There was also a kid function on Saturday that he had already committed to handling.
So, he left at 7:45 Friday night. I waited 10 minutes to make sure he wouldn’t forget anything, then scrambled to work. I had managed to get the old lining out and the outside of the box sanded before he got home that afternoon, so I sanded and scraped out the inside (there was cardboard under the felt that was really, really stuck). Then I painted the outside with a coat of Glidden Candy Apple Red (I had a quart sample from somewhere) and put the box somewhere out of the way (a kid’s room) to dry and started on the little pillows that the watches sit on. Note: It takes FOUR HOURS before you can recoat with that paint. Did I have four hours?? Ugh.
So anyway, I started on the pillows. These were ridiculously simple: I cut 4-inch wide strips, machine-sewed them down the sides, sewed across at 3.75 inch intervals, turned them right-side out, overstuffed them with polyfil, and stitched them. Except…
I was always taught that after you stitch and before you turn it right-side out, you trim the excess to make it neater. I had never worked with this kind of fabric before. Guess what happens when you trim the excess on a fabric that frays at the drop of a hat? Yep, every single seam came undone. I’m a little slow on these things, so it wasn’t until after the third pillow did this that I figured out that I was not, in fact, incompetent, I just needed to stop trimming!
Once I figured that out I was able to get 10 of the pillows done before midnight, when it was time to recoat the box. I got the second coat on and the box re-hidden, then put away my supplies and called it a night at 12:45.
The next morning I hit the boards running as soon as Alan was out the door. First I used a completely toxic but very effective glue, E-6000, to glue down the velvet lining of the box. Here we have the Flaw I Didn’t Have Time to Fix: the fraying edges. I’m planning to try Fray-check on it.
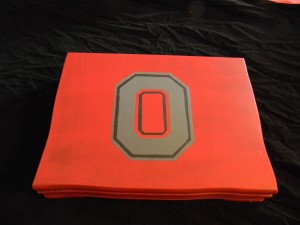
After that, I finished the last two pillows, hid everything again, and stopped to make lunch for the family. Once they were out the door, and I had run another child to and from ballet lessons, I printed an Ohio State Block O stencil and used my exacto knife to cut it into sections. I copied the stencil onto the box and used the acrylic paints to paint it.
Last but not least, I cut the mat board into sections and made the dividers, then put the pillows in and tucked the whole thing away to dry.
It was a fun project, and my husband was totally surprised (and thrilled, I think)! I did learn a few things that I thought I’d share:
- Ventilation is your friend. Glue and paint, ugh.
- Fabric that frays is a pain.
- The magic eraser really is magic!
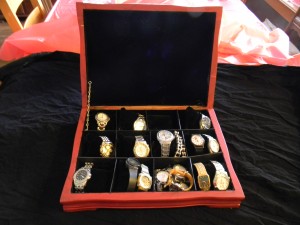
Here's a picture of the inside of the box.
Music to Create By: Kidults
Kidults is our all-time, go-to, high energy music. The artist is Mandy Patinkin- does the name ring a bell? Although Mr. Patinkin has done countless tv shows, plays, and movies, in our house he will always be “My name is Inigo Montoya, you killed my father, prepare to die.”
(The Princess Bride. Best. Movie. Ever.)
The music on this album is a combination of classic kid songs, like “A Tisket, A Tasket,” songs from musicals, like “If I Only Had a Brain,” and a few oddballs. There are also two perfect Valentine’s songs: "A You're Adorable" is an alphabetic tribute, and "Rhode Island is Famous for You" is a tongue-in-cheek look at the fifty states (pencils come from Pennsylvania…)
The combination of laugh-aloud humor and music keeps us all in stitches. I can’t recommend this one enough. “Cat’s in a Cradle” depresses me, so I skip it every time, but we would not miss “April in Fairbanks” for anything!
Fiction to Inspire: An Undone Fairy Tale
An Undone Fairy Tale, written by Ian Lendler and illustrated by Whitney Martin, is a hilarious romp that engages the reader with every turn of the page. Although the story contains the traditional princess in trouble, gallant knight, and evil, imprisoning king, the star of our story is the illustrator, Ned.
Ned is trying his best to complete the story illustrations, but he keeps falling behind. When we ignore his pleas to slow down, he is forced to resort to the silliest substitutions imaginable. No time to draw horses? Then they’ll ride fish.
In addition to sheer laugh-out-loud fun, An Undone Fairy Tale makes the artist in us want to jump right in. What would we substitute for horses? How would we deal with Sir Wilbur’s armor problem?
This is a picture book, recommended for grades 1-3; however, I’d recommend it to anyone who loves art. And laughter.
Subscribe to:
Posts (Atom)